Having deployed two instances of the HP 3PAR simulator in previous posts (on ESXi and VMware Workstation) it’s time to configure the Remote Copy over IP (RCIP) feature.
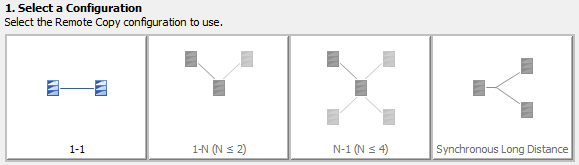
In a ‘real’ 3PAR deployment Remote Copy allows a 3PAR array to copy volumes from a source to a target – this can be a 1-1 relationship or a 1-many. The simulator will only allow for a 1-1 configuration.
System Requirements
To run RCIP you will (obviously) require two instances of the 3PAR simulator. The cluster nodes will also need to have 4GB of RAM allocated – this is an upgrade from the standard 2GB the image deploys with.
The full HP requirement listing from the simulator documentation is detailed below.
To run a 1:1 RCIP configuration in an ESXi server or Workstation environment, your system needs to be able to support:
- A total of 6 VMs, three VMs for each simulated storage system
- The cluster node VMs require 4GB memory each
- The two instances of the simulator can be run in a single system or two different systems. The RC network connectivity between the two simulator instances must be setup via a separate vSwitch on ESXi or LAN segment on VMware Workstation 9 or 10. The vNIC#2 in each of the cluster nodes must be connected to the vSwitch or the LAN segment
The following requirements are general RC requirement, not specific to simulator –
- One static cluster IP address for each cluster
- One static IP address for each RC port, the RC IP address must be in a different subnet than the primary node and cluster IP address (vNic#2 in each cluster node VM)
RCIP Configuration
- Logon to both arrays and click on the Remote Copy tab
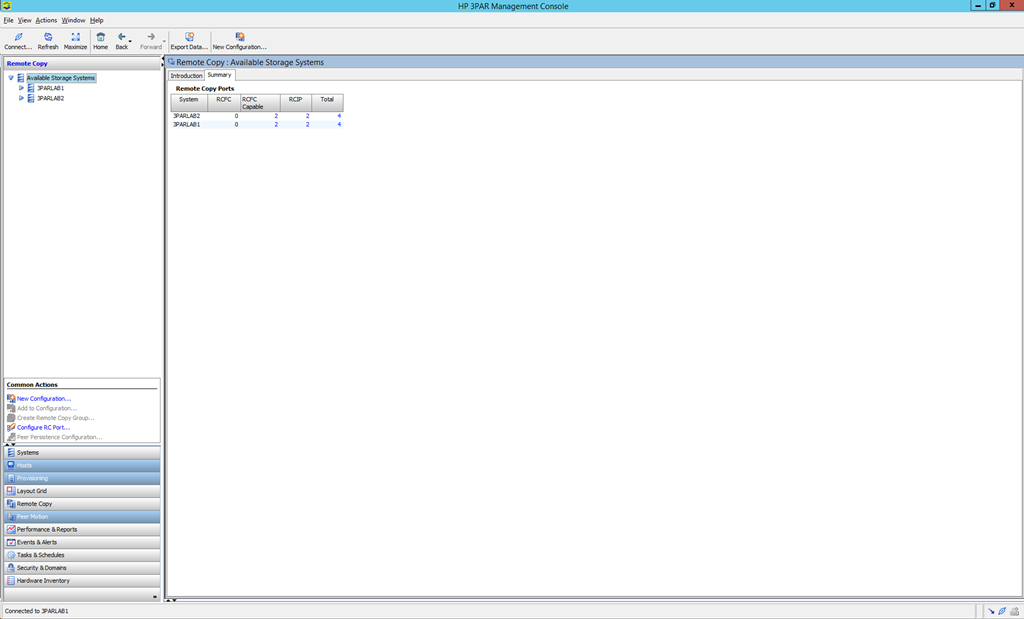
- Click ‘New Configuration’, this can be found either under the ‘Common Actions’ list or along the top toolbar
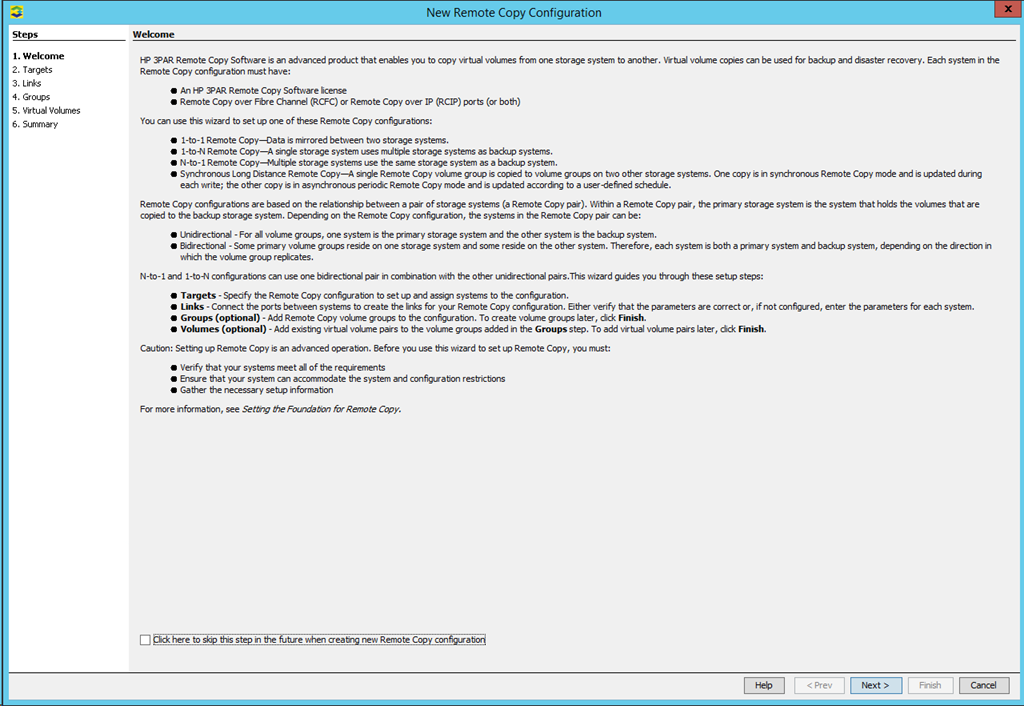
- Click ‘Next’
- Click the ‘1-1’ button
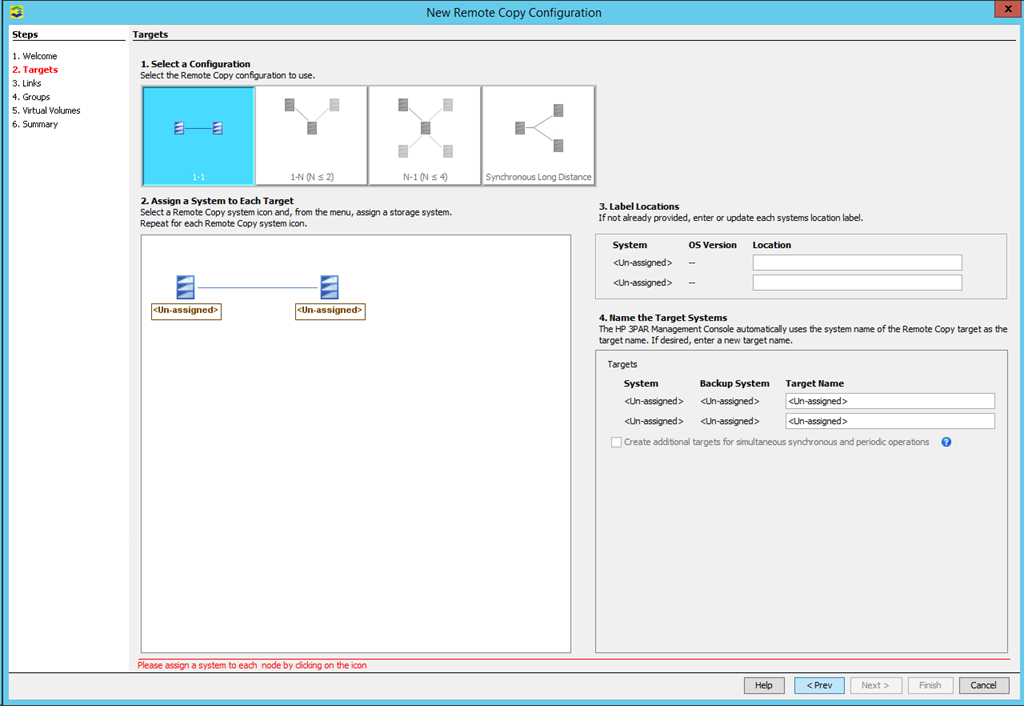
- Click on the ‘Un-assigned’ icon representing an array and select one of your simulator instances
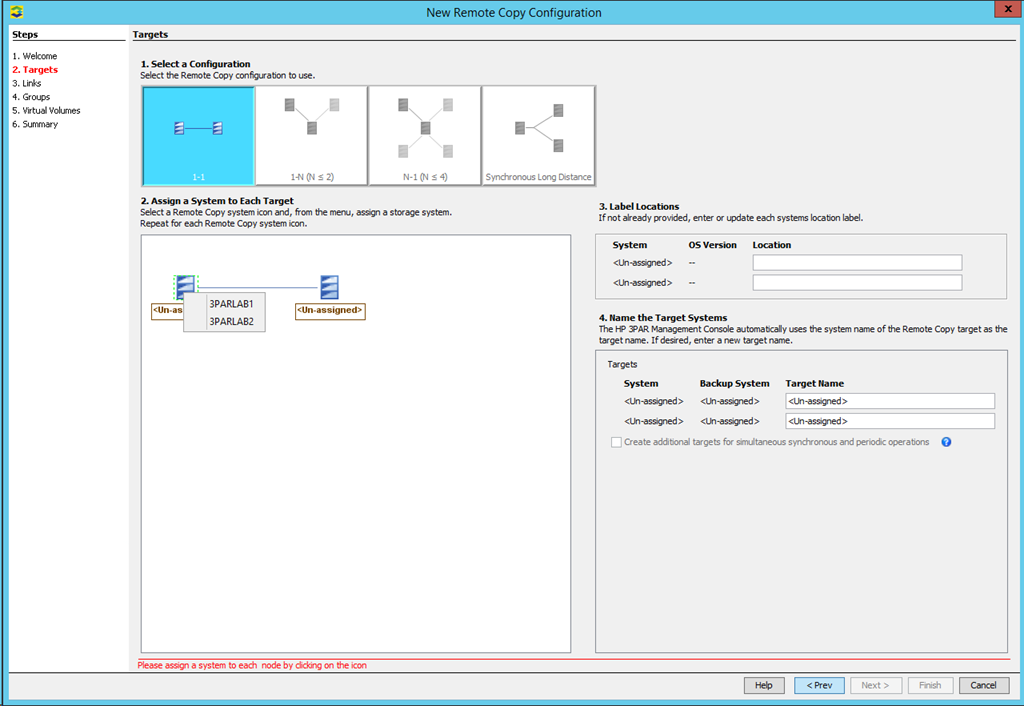
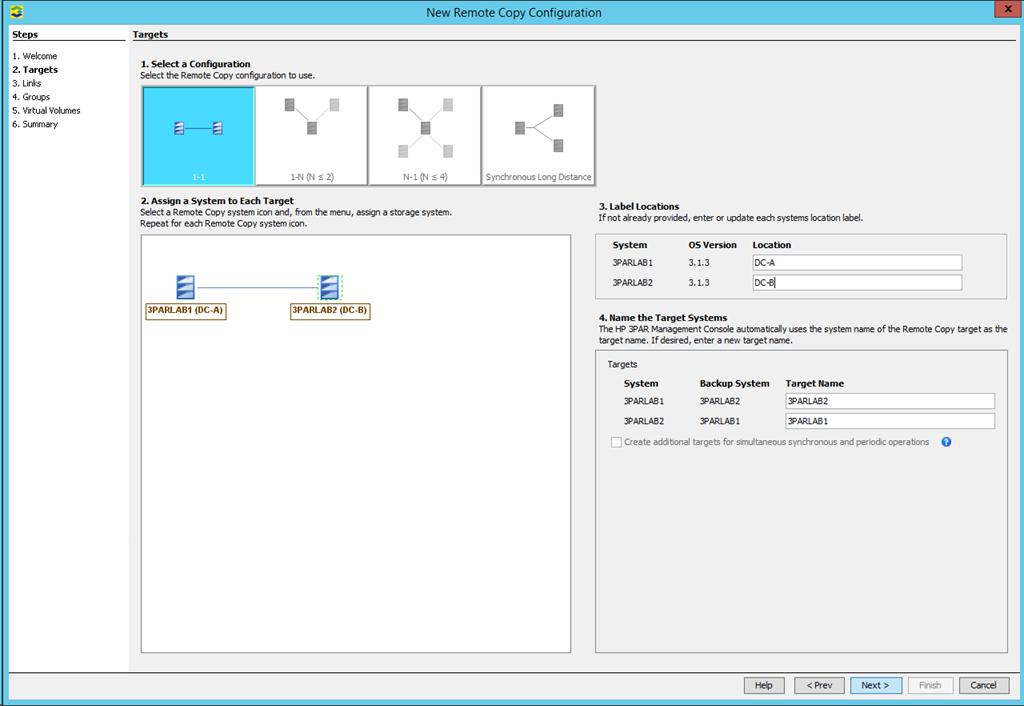
- Click the second ‘Un-assigned’ icon and select the second instance
- Enter useful information under the ‘Location’ fields
- Click ‘Next’
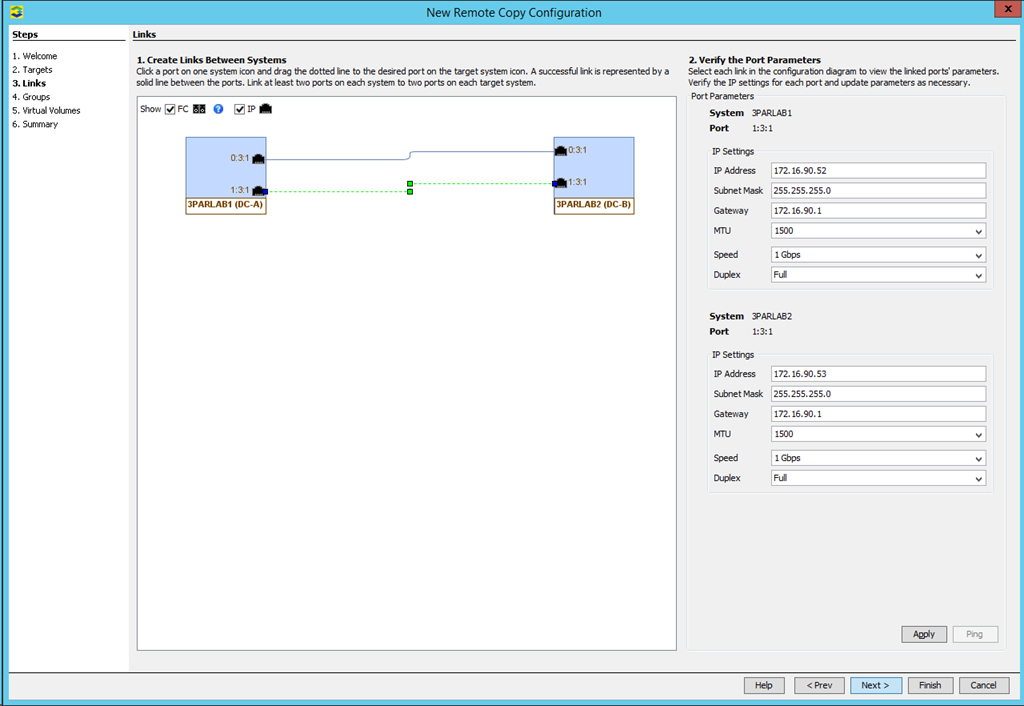
- This next section requires you to ‘Click and Hold’ the mouse button on the icon representing a network interface on one instance and drag to the network interface on the second instance. It doesn’t show very well on this screenshot but if you look carefully you can see the blue dashed line

- If successful you should see the two sockets linked
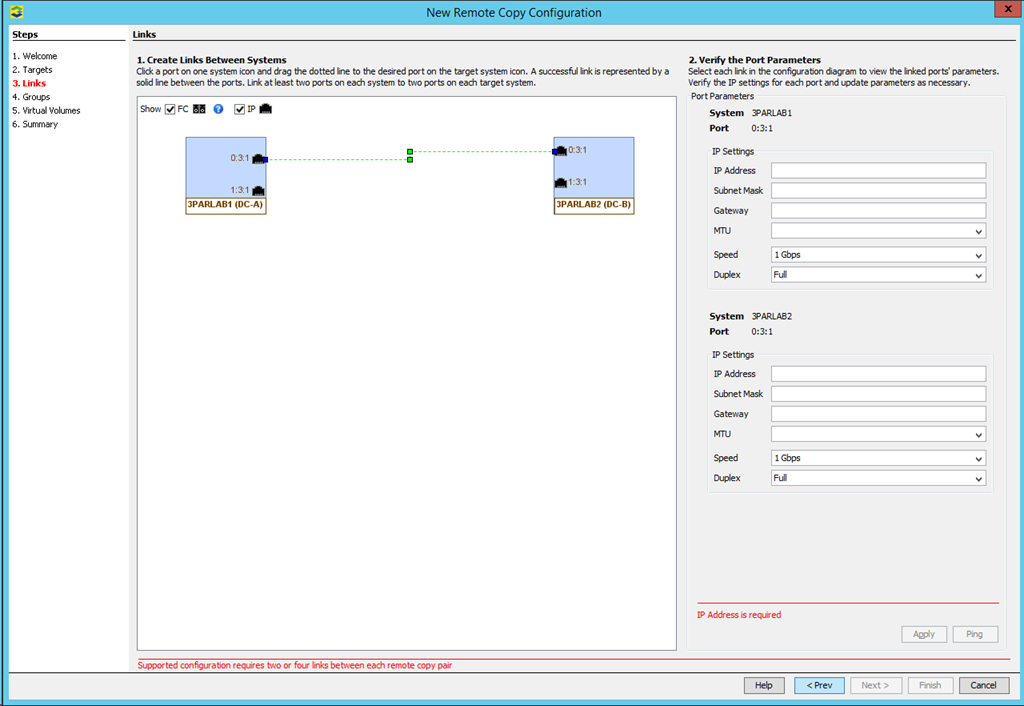
- Configure IP address details for the RCIP link
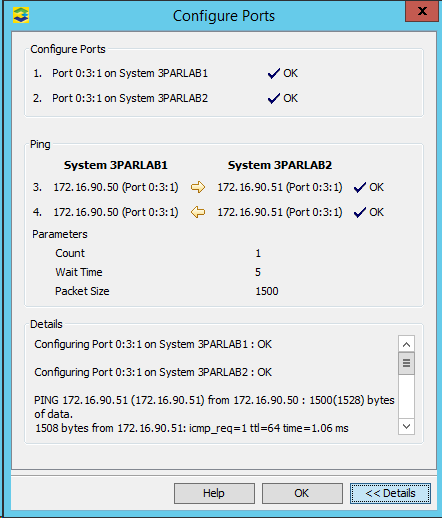
- Click the ‘Apply’ button
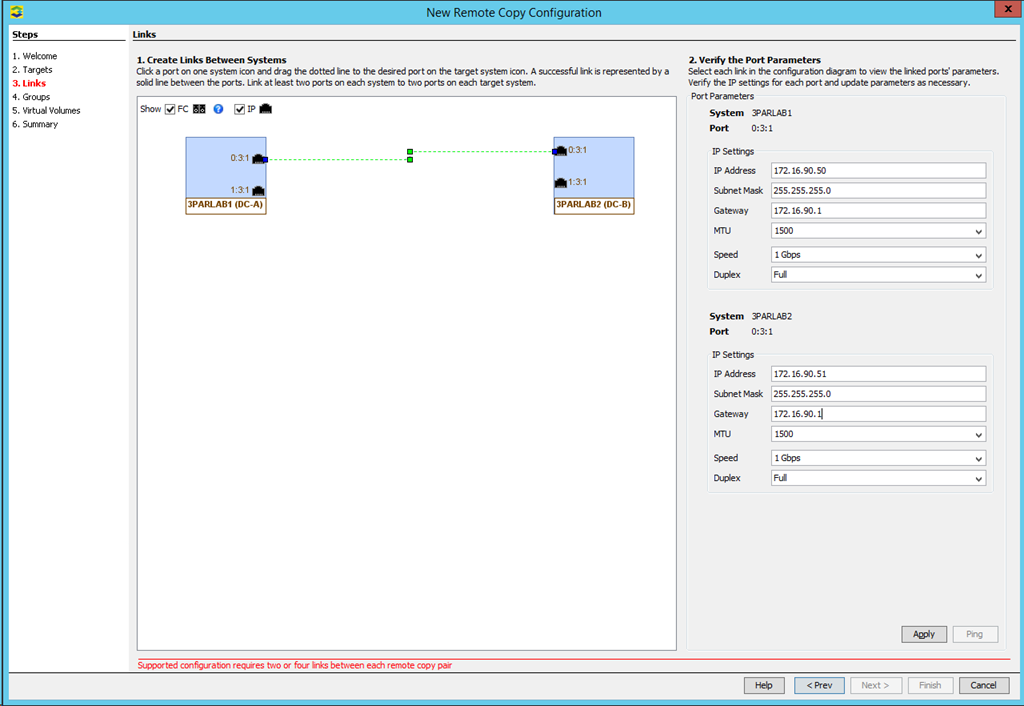
- A popup window will appear and should confirm the settings have been applied and connectivity was successful
- Click ‘OK’
- If this stage was not successful check the networking for your instances as per the deployment posts
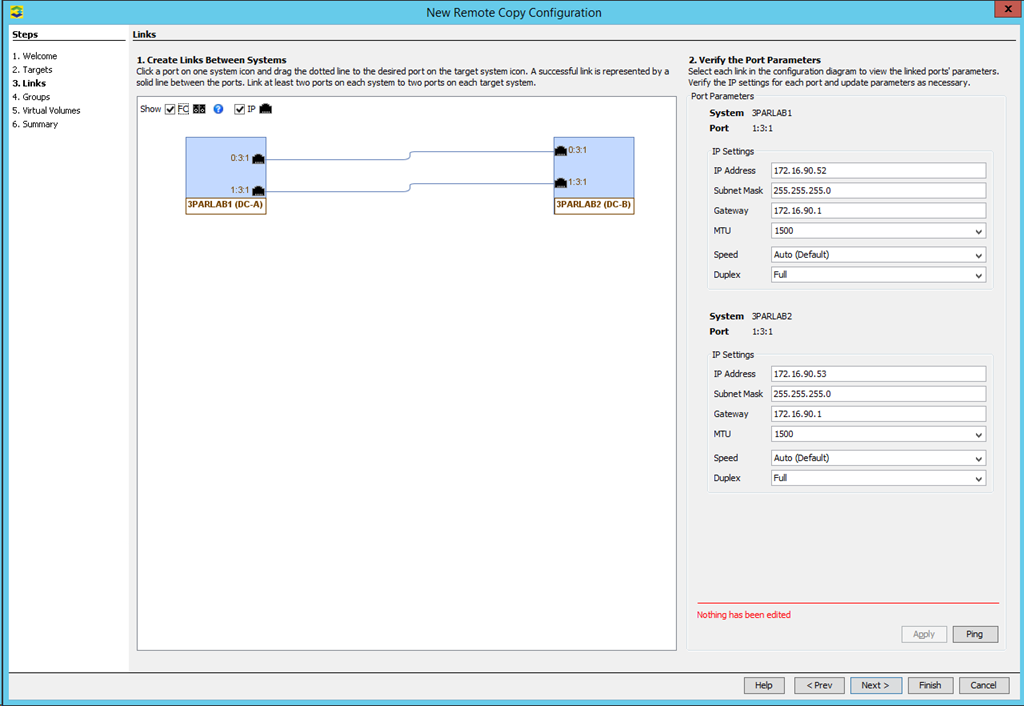
- After clicking ‘OK’ you should see the green dashed line has now changed to a solid blue one

- You will notice the ‘Finish’ button is still greyed out this is because we now need to configure the second set of ports for RCIP
- The process is the same as before

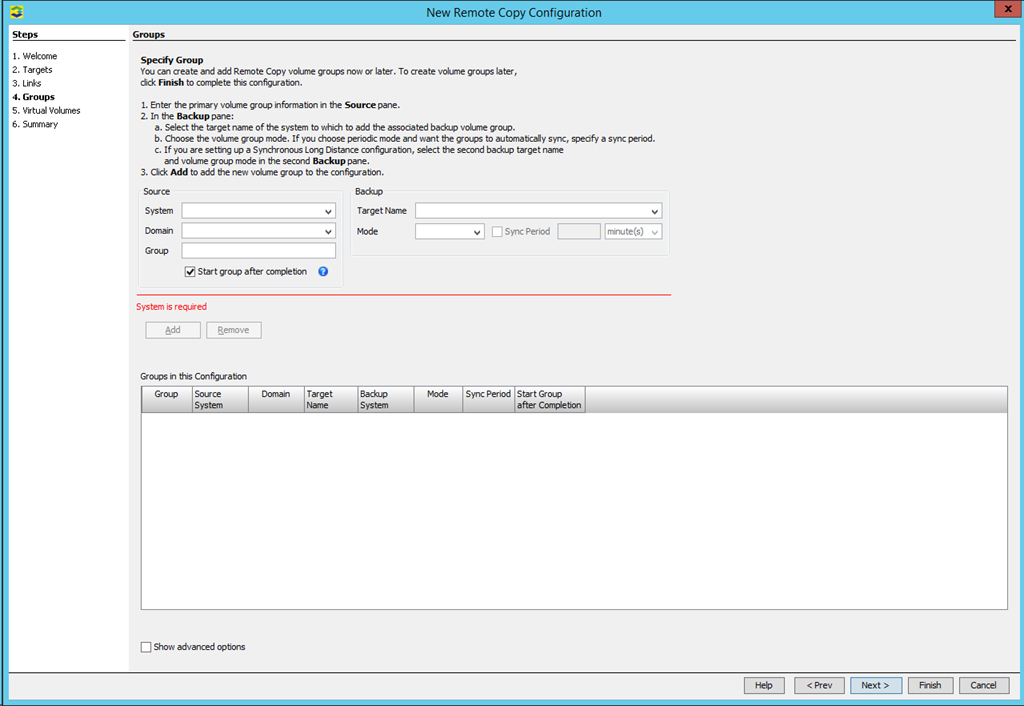
- Click ‘Next’ if you want to configure Remote Copy Groups (RCG) now, otherwise click ‘Finish’
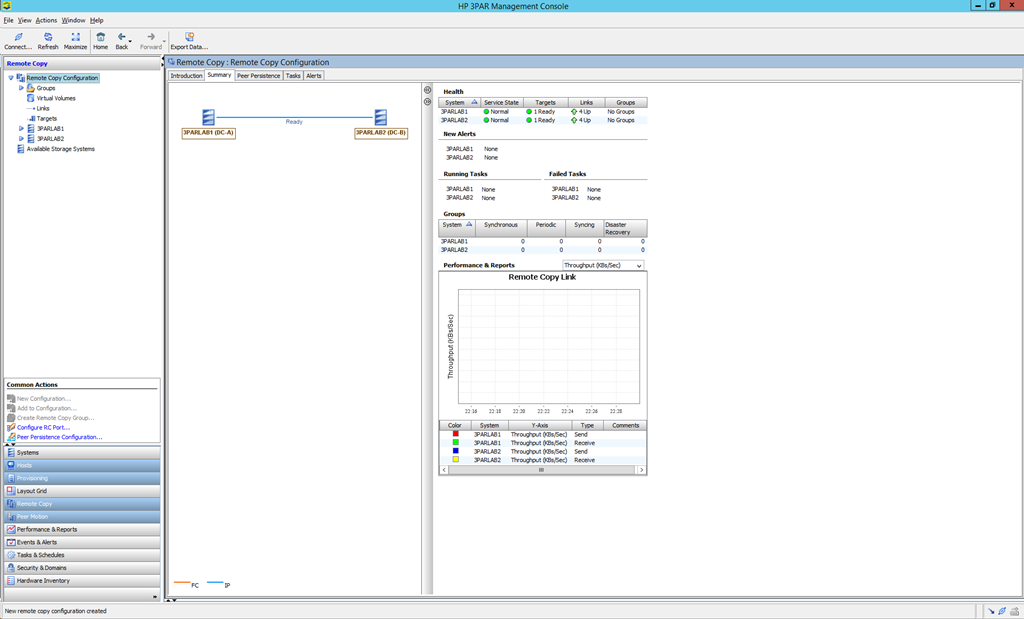
- Give the system a moment to complete the changes then you should notice the ‘Remote Copy’ menu changes with additional options
CLI RCIP Configuration
Simulator Instance 1
- First setup the netc configuration to configure cluster IP; this is required for the RC commands to work
netcconf -set
- Follow the prompts to enter IP address, subnet mask and gateway address
- To verify the configuration, use the command
shownet
- RC configuration
controlport rcip addr 172.16.90.50 255.255.255.0 0:3:1 controlport rcip addr 172.16.90.52 255.255.255.0 1:3:1
controlport rcip gw 172.16.90.1 0:3:1
controlport rcip gw 172.16.90.1 1:3:1
- Use showport –rcip to verify the RC port information
Simulator Instance 2
- First setup the netc configuration; this is required for the RC commands to work
netcconf –set
- Follow the prompts to enter IP address, subnet mask and gateway address
- To verify the configuration, use the command
shownet
- RC configuration
controlport rcip addr 172.16.90.51 255.255.255.0 0:3:1
controlport rcip addr 172.16.90.53 255.255.255.0 1:3:1
controlport rcip gw 172.16.90.1 0:3:1
controlport rcip gw 172.16.90.1 1:3:1
- Use showport –rcip to verify the RC port information
Simulator Instance 1
- To verify the RC link connectivity
controlport rcip ping 172.16.90.51 0:3:1
controlport rcip ping 172.16.90.53 0:3:1
- To start remote copy and create target
startrcopy
creatercopytarget srcp2 IP 0:3:1:172.16.90.51 1:3:1:172.16.90.53
- To create a CPG and a VV
createcpg -ha mag -sdgs 16g -sdgl 32g -sdgw 24g cpg1
createvv -snp_cpg cpg1 cpg1 vv1 10g
Simulator Instance 2
To verify the RC link connectivity:
controlport rcip ping 172.16.90.500:3:1
controlport rcip ping 172.16.90.52 0:3:1
Now that we have RCIP configured we can setup volumes to be replicated between the two simulators.
Thanks you very much for informative guide. You are a savior!
You’re welcome – glad the content was of use.
Alex